AdOperator Review – Is It Worth? [Bonus Inside]
Last updated on July 4, 2024 by Jairene Cruz-Eusebio 13 min readTable of Contents
ToggleAdOperator Overview
Ever asked yourself where’s the best place to put your advertising money? AdOperator is here to help. This programmatic platform leverages intelligent technology to ensure you get the most out of your ads — connecting you with the right people, serving your ads quickly and effectively, and utilizing an exclusive inventory of top-performing ad formats.
But is this ad network all that it promises to be? With this AdOperator review, we’ll dive deeper into this advertising network and evaluate whether it is a good option for both advertisers and publishers.
Let’s get started by defining the network.
AdOperator: Offers & Verticals
Ad types: Popunders, In-Page Push ads, Push Notification Ads
Verticals: Dating, Betting, Casino, E-commerce, Finance, Sweepstakes, Nutra, Web Utilities
AdOperator: Payment & Investment
Cost Model: CPC, CPV (multiply by 1000 to get CPM)
Minimum Deposit: $100
Payment Methods: Credit cards, Bitcoin, Litecoin, Bitcoin Cash, XRP, Ethereum, USDT ERC20, USDT TRC20, USDC, DAI, XLM, BNB, BUSD, AliPay, Webmoney EURO, Capitalist, Paxum, PayPal, Bank Transfer, Gift Card
AdOperator: Support
Personal Account Manager: Yes
Knowledgebase: It has an FAQ and Support section with useful guides.
Support Response Speed: Excellent. The support team responds within minutes when contacted through the live chat.
Support Rating: Excellent. AdOperator’s support team not only responds quickly, but also thoroughly, making sure that you get everything you need before leaving you to your devices.
Contact Methods: Live chat and Email
Email Contact: support@adoperator.com
What is AdOperator?
AdOperator has been shaking up the digital advertising market since its debut in 2018. Despite being relatively new, this ad network is gaining ground thanks to its reliable source of various kinds of traffic and innovative approach to advertising.
Whether you’re an out-of-the-box thinker looking for fresh opportunities or an established company curating targeted campaigns, AdOperator offers diverse and cutting-edge solutions that will give your campaigns the boost it needs.
Quietly tucked away in the depths of cyberspace, AdOperator boasts a massive traffic source that can generate an astounding 50,000 ad impressions per second or 3 Billion ad impressions per day. From this traffic, almost two thousand active ad campaigns receive an average of four million clicks daily.
Whether you’re running a small business or managing a large-scale campaign, AdOperator’s multitude of features can ensure that your venture receives consistent, solid results — and all while staying within your budget.
AdOperator Best Features
Knowing an ad network is half the battle, so before signing up, you must first learn about its main features. AdOperator offers a wide range of attributes designed to make marketing and advertising easier.
Three Popular Ad Formats
For any ad strategist who wants to truly capture their target audience’s attention, AdOperator provides three popular ad format options.
First is its push notification ads that allow for direct communication with customers, with the ability to send instant notifications right to user devices with minimal interruption.
For a more subtle approach, in-page push notification ads (web push traffic) maximize engagement by appearing next to content on the page and presenting a call-to-action that looks like a legitimate message.
And, of course, popunder ads use an age-old technique that works — customers view your material as soon as they visit a website you advertise on — so you’re sure not to be missed!
Deep Targeting
The modern advertiser needs highly precise targeting capabilities that can be adjusted in real-time. AdOperator‘s advanced deep targeting features make it easy to reach the right customers with the right message.
Whether you’re looking to connect with a nearby city or a global audience, their fine-tuned location targeting options have you covered — they can target by city, region, or country.
They also enable you to pinpoint your message based on operating systems and versions, browsers and language preferences, connection type, and carrier (mobile operator targeting); plus, there’s always the option of a targeted IP list if that’s more your style.
To top it all off, their handy day-parting feature allows for even finer control over when your messages get seen. If that wasn’t enough, AdOperator also offers Subid Optimization tools so you can whitelist or blacklist SubIDs — whichever best suits your goals.
Works with Several Verticals
AdOperator helps advertisers get high-converting traffic across a range of verticals. From dating and betting to e-commerce, the possibilities are endless. The ever-growing Nutra space has proven to be particularly favorable for affiliates running media buying ads here.
Get ready to cash in with your fantastic casino promotions or explore financial offers. And when it comes to an extra boost of earnings, be sure to try running sweepstakes campaigns for those ultimate winnings!
Rate Card
Rate Card is AdOperator’s traffic estimator. It allows you to accurately determine the total traffic volume based on factors like ad format, country of origin, and operating system. Not only that, but the rate card will tell you the impressions, clicks, CPM, CPV, and CPC generated daily — all crucial data points that’ll help you bid smarter.
Reports Manager
With the Reports Manager from AdOperator, you have a one-stop shop for all your campaign data. Not only can you monitor your campaigns and track progress in integrated analytics reports, but you can also customize reporting — no more spending hours manually exporting and crunching data!
Additionally, the Reports Manager allows you to drill down on data sets quickly and easily, so working with numbers is no longer a chore. All this makes it so much easier to keep track of campaigns and make decisions to optimize their performance.
Premium Advertisers Account
With AdOperator‘s Premium Advertiser Account, you get to enjoy industry-leading advantages. Your campaigns are sure to be quickly approved and moderated with priority. Plus, you get a dedicated manager who will handle all your ad campaign optimization needs so that your campaigns will run at their very best.
Whether it be a credit line or net post payment, you can pay in the way most suitable for you — especially if your application for a credit line is accepted. You likewise get access to premier traffic sources before anyone else. You’ll also be allowed full API access to campaign management on top of having access to all the new features before they are officially released!
In order to qualify for a Premium Advertiser Account, though, you must first reach an overall ad spend of $3,000. Once you’ve reached this level, you can contact support to apply for the Premium Account. You can see your account level under your profile name upon logging in.
Referral Program
AdOperator’s referral program is a good way to earn extra money while using the platform. It rewards current users with 7% of the ad spent by referred advertisers, providing a great opportunity to gain additional income without any extra effort.
The referral program is open to all AdOperator users, regardless of experience level. All you need to do is refer a friend or colleague and you’ll earn a commission on their spending. Your earnings will be credited to your account balance each month, which can then be withdrawn or used for future ad campaigns.
The minimum withdrawal amount is $50, payable via Paypal.
How to Start Advertising with AdOperator
By utilizing AdOperator’s easy-to-use self-service platform and a combination of creative content and targeting, you can quickly create and optimize campaigns that drive forward measurable results for your affiliate marketing business. So if you’d like to use this advertising network, you must, of course, first create an account there.
There’s nothing to it; you simply head over to the sign-up page. Use our AdOperator coupon to get a $200 bonus!
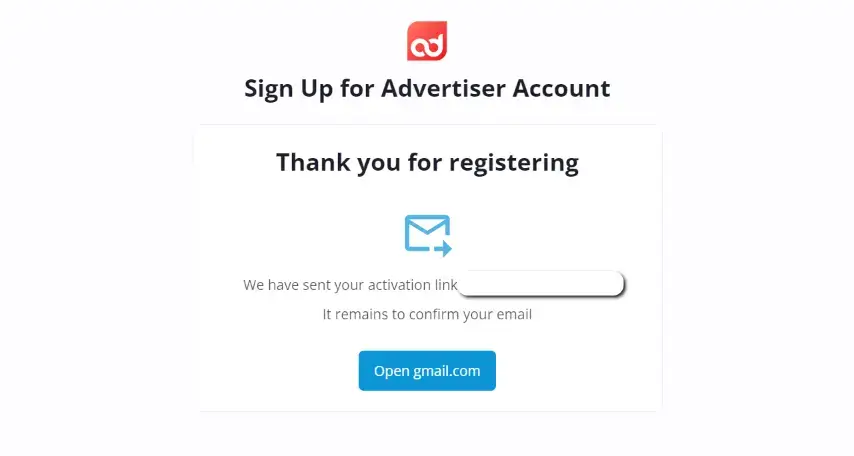
Complete the form and then confirm your account by checking the email that AdOperator sent you.
You can immediately log in to your account upon confirming it. If you already have campaigns running, the dashboard should show you charts and tables (interchangeable) that display your ad campaign performance. You can customize the widgets displayed to show stats that matter to you. This makes it easy for you to get a quick glimpse of how your ads are doing.
Creating A Campaign in AdOperator
Launching your first AdOperator campaign can be exciting yet daunting, but not to worry, we’ll help you out in that respect.
Once inside the dashboard, you’ll find that everything is pretty self-explanatory. On the left pane, you’ll find the shortcut to your campaigns, reports, billing, rate card, and support.
Step 1. Create New Campaign
Head over to the Campaign tab and click on the Create Campaign button.
Fill out the campaign name and target URL (if the ad type is popunder; if not, the target URL will be added in the creatives section). Then choose the ad format: popunder, push, or in-page push.
Step 2. Place Your Budgets and Bid
Next, place your total and/or daily budget. The minimum for both budgets is $20 if you opt for popunder and push ads. But if you choose in-page push, the minimum is just $5 for both total and daily ad budgets.
Bids on push notifications and in-page push ads are click-based (CPC bidding model), while bids on popunder ads are on a per-view basis (CPV). The lowest CPC rate you can place is $0.001, while the lowest CPV rate is $0.0002.
If you are used to CPM bids, just multiply your CPV bid by one thousand, and you’ll get the rate. For instance, if you bid $0.001 on CPV, the equivalent CPM is $1.
If you’re wondering about how much you ought to bid, you should use the Rate Card to see the minimum bids to get traffic into your campaigns. We’ll talk more about the traffic estimator in a short while.
Step 3. Adding Creatives
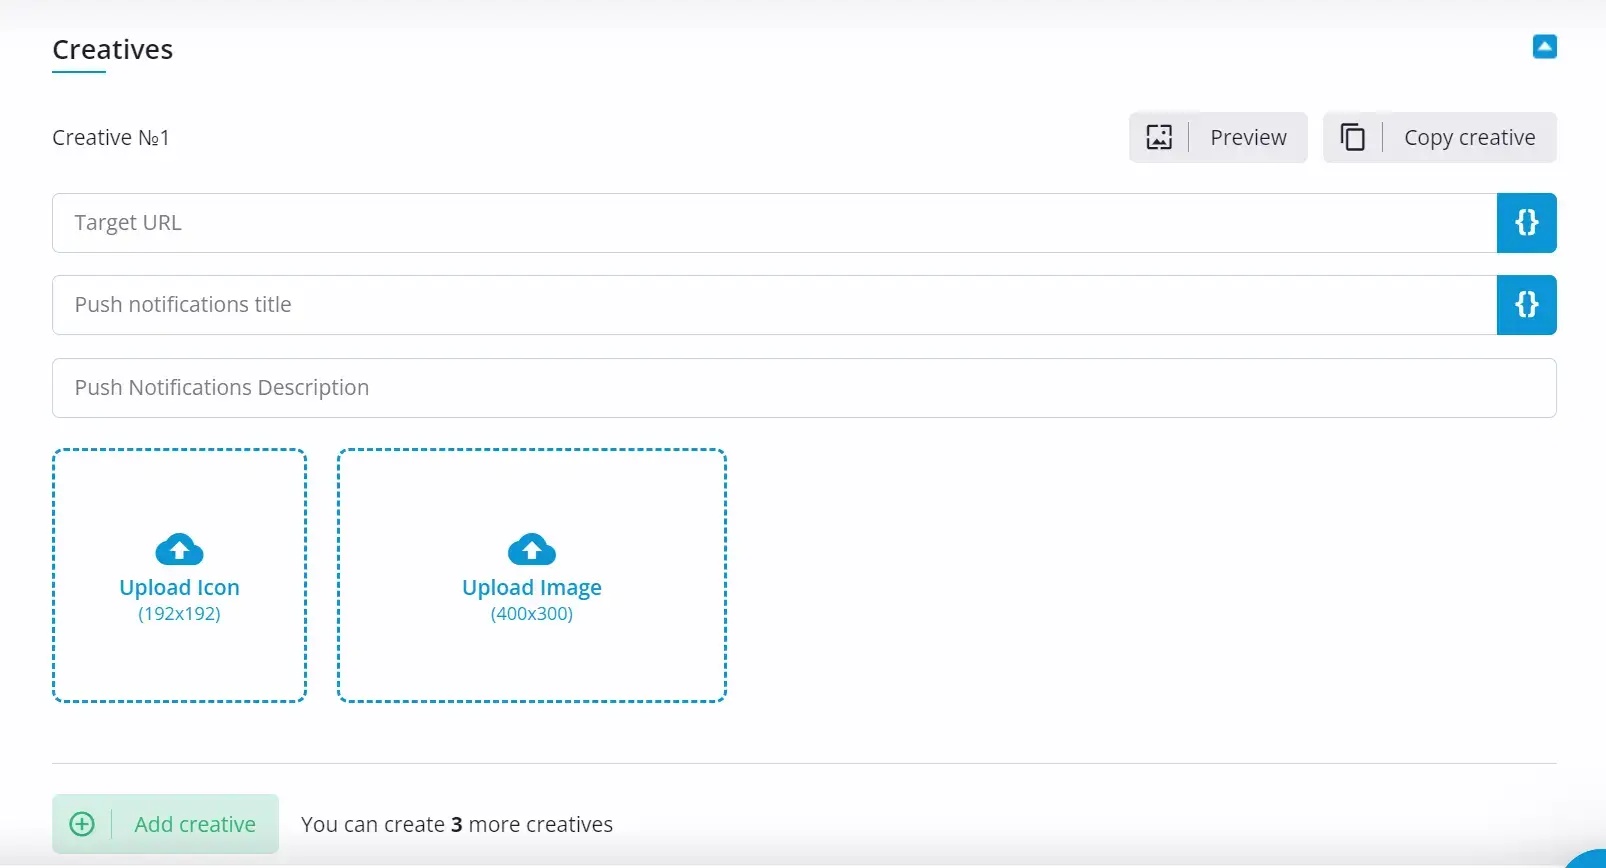
For push notification ads and in-page push ads, you can add up to 4 creatives. (Note: The target URL is asked at the beginning of the campaign creation if you opt for popunder ads)
For each creative, you’ll be asked for the target URL, title, ad description, and icon (192 by 192 pixels). You also have the option to upload a banner image (400px by 300px) for push notification ads.
Step 4. Select Targets
In this section, you have the choice to focus on your potential audience based on country, operating system and its version, type of browser, plus connection type and carrier.
For even more control, you can dive deeper into regional targeting levels, city-level targeting, and browser language. For push notification ads, you can select audiences based on their subscription lifespan.
If you have a list of IPs to whitelist/blacklist, you can add them up in this section as well. You also have the option to create an IP list from the main dashboard so you won’t have to edit from within an active campaign for adjustments. We’ll discuss how to do this later.
Lastly, day parting is available so you can send out notifications at the exact times best suited for when customers are most likely to click or respond to your offer.
Step 5. Conversion Tracking
Adding conversion tracking is an important step for any marketing process, and you can do so in AdOperator by simply copying the postback URL provided in this section and then pasting it to your third-party affiliate tracking platform.
If you don’t have a tracker, you can add it to your affiliate network or program. Only do this if you want to monitor conversions within AdOperator.
Step 6. SubID Optimization
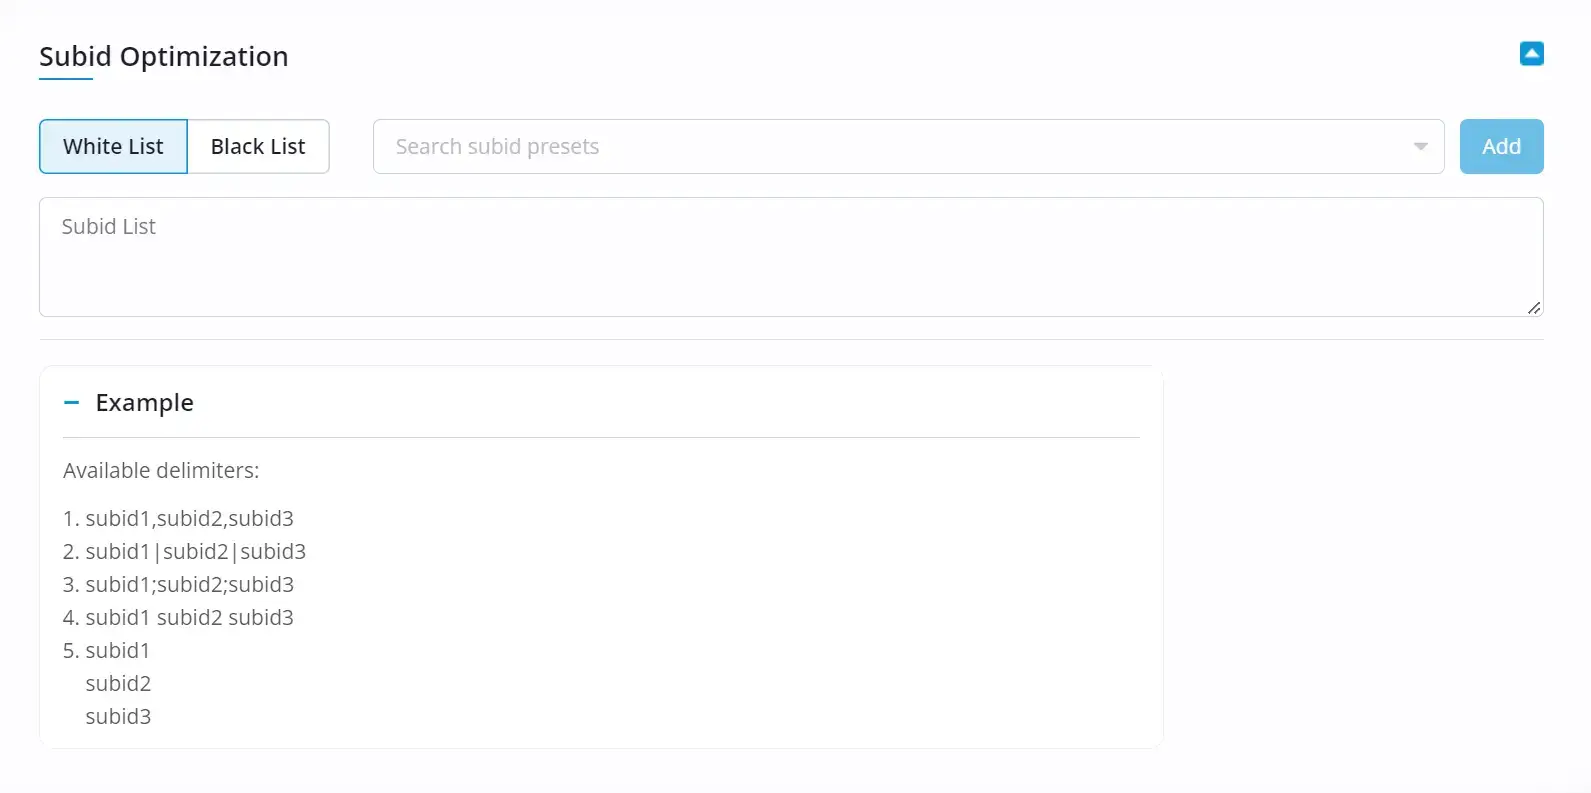
Adding a list of subIDs to either blacklist or whitelist on AdOperator is an effective way to optimize campaigns and get the most performance out of online marketing efforts.
Just like the IP lists, you can add a list of SubIDs in your dashboard so that adding/removing sources from within a campaign won’t be too complicated.
Step 7. Submit for Review
After completing the initial set-up, click on Start Campaign, and the ad will be submitted for review. You will be taken to the Campaigns dashboard where you’ll be able to see the status of all your campaigns.
Step 8. Add Funds
Now, even when your campaign gets approved, it will not run unless you have added funds to your account. So let’s head over to the Billing section.
Choose from any of the available funding options:
- Credit card
- Cryptopay, Bitcoin, Litecoin, Bitcoin Cash, XRP, Ethereum, USDT ERC20, USDT TRC20, USDC, DAI, XLM, BNB, BUSD
- PayPal
- AliPay
- Webmoney
- Capitalist
- Paxum
- Bank Transfer
- Gift Card
The minimum deposit is either €100 or $100, depending on your funding choice, except for bank transfer which requires at least a $500 deposit. AdOperator covers almost all of the processing fees except for bank transfers, Cryptopay (1%), and Paxum ($0.25).
Monitoring Campaigns
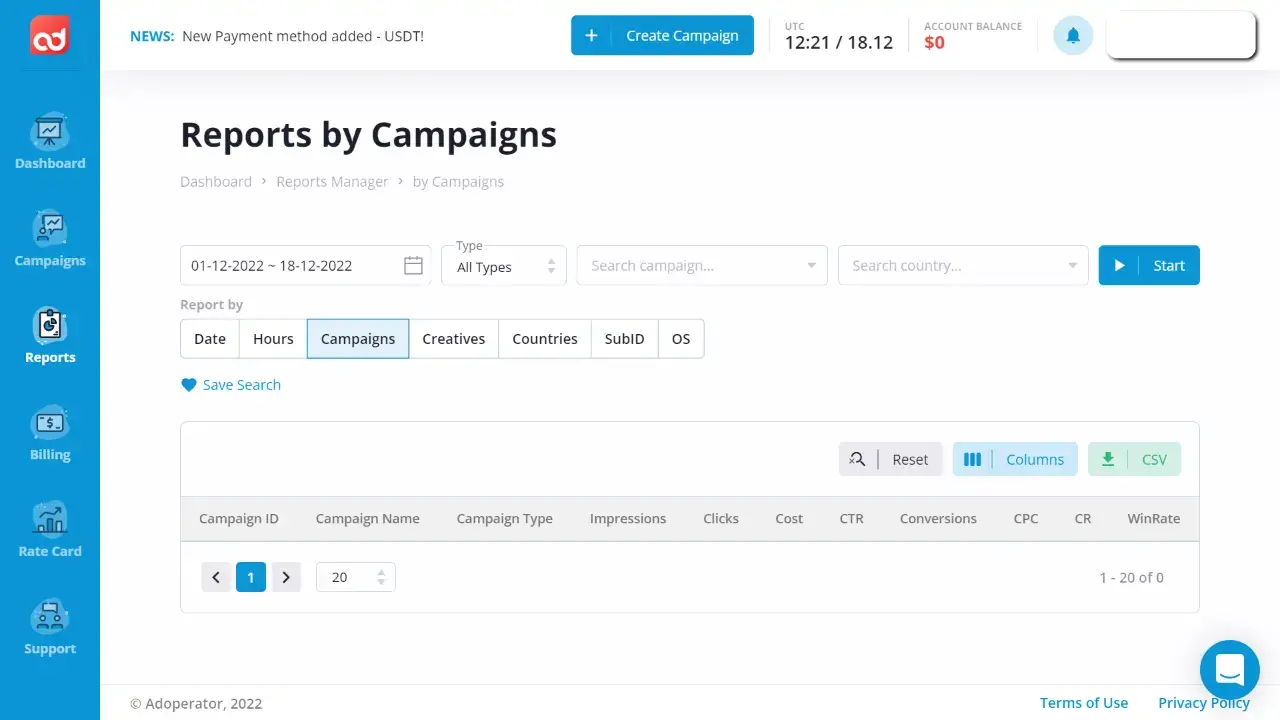
AdOperator‘s reporting system makes it easy to monitor campaigns efficiently so you can spend more time optimizing and problem-solving. It has a variety of solutions for generating report based on ad type, date, hours, campaigns, creatives, countries, subID, and OS.
Reports are updated frequently so you won’t have to worry about missing out on important data.
You can quickly drill down into the data to find just the metrics you’re looking for — impressions, clicks, cost, CTR, CPC, conversion rate, and win rate. If you want to save a custom report setting, you can click on “Save Search” and then run the same search next time, so you won’t have to set it up again manually.
AdOperator offers a range of options to help maximize your performance, including customizing a list of sources (SubIDs) to use as blacklists or whitelists.
To blacklist subIDs, look for the specific campaign you want to optimize, then click the SubID filter. Arrange the subIDs as you want (by clicks, cost, impressions, etc.). Turn off those that you wish to deactivate by toggling the on/off switch.
You can activate or deactivate multiple SubIDs at once by enabling multi-selection; this will show checkboxes next to each SubID that make it easy for you to mark them for enabling or disabling. You can also mark subIDs to add them to a preset.
Checking Recommended Bids
Setting your bid is almost like an art — you need to find the right balance between having a bid high enough to get you traffic, and also low enough to make it profitable for you.
In order to find the perfect bid, you must first visit the Rate Card, which is like AdOperator’s traffic and bid estimator. Click on the Rate Card link in the menu to visit this page.
You can narrow down the list by indicating the country, advertising format, and operating system. Filtering based on region (Tier 1, Tier 2, Tier 3, and Latin America) is also possible.
What I like about AdOperator’s Rate Card is that the numbers change throughout the day, depending on the number of competitors, the amount of inventory, and more. This means this is not an average report based on data from long ago — it’s up to date.
Adding IP List and SubID Presets
Building a list of IPs and subIDs to either blacklist or whitelist in AdOperator can make a huge difference in how your campaign runs. By having firm control over who you want participating in your ad campaigns, you are setting yourself up for success by ensuring that you are getting traffic from optimized sources.
To create an IP list, head over to the Campaigns section of your dashboard, then select the IP Lists tab.
Click on the Add IP List button to create your list. Add the name and IPs (one IP per line) or upload a text file. Click Create IP List once done.
Creating a SubID Preset is almost the same. Still in the Campaigns section, click on the SubID Presets tab.
Click on the Add Subid Preset button and create your list. You can use this list to add a blacklist or whitelist to your campaign. Update this list when trying to optimize ad campaigns instead of editing your campaign’s settings over and over.
Getting Assistance and Support
When it comes to getting the help you need while using AdOperator, their team has got your back! AdOperator’s live customer support is available 24/7 for providing assistance and guidance. The AdOperator team does an excellent job of responding promptly to inquiries and providing helpful solutions. You can reach them via live chat or email (support@adoperator.com).
Not sure how to use the platform? Don’t worry, they have developed intuitive and detailed guides so you can get up to speed quickly. You also can access the knowledge base within the dashboard, which includes articles that provide more information on topics such as adding funds, setting up campaigns, customizing your dashboard, and more.
AdOperator Pros and Cons for Advertisers
AdOperator is an advertising platform that promises to deliver high-quality traffic. On paper, it looks great, but before you start working with it, let’s take a look at its pros and cons.
Pros
- Works directly with legit publisher sites so rates are cheaper than most (starts at $0.0002 per view and $0.001 per click)
- Has a straightforward platform that is easy to navigate
- Offers three ad formats
- Its Rate Card regularly updates, giving you the latest bidding rates and traffic volume estimates
- Covers the processing fees of most funding options
- Provides a chance to have a managed account (premium advertiser account) at no extra cost, but by just reaching a minimum ad spend
Cons
- Maximum of four creatives per campaign
How to Earn Money as a Publisher with AdOperator
Ad networks are an easy and efficient way to earn money from your website or blog — and AdOperator is the perfect platform for doing just that! This advertising network allows publishers from all around the world to join in and monetize their content.
Their verification process is simple and straightforward, and the implementation of tags on your pages is effortless. Additionally, AdOperator offers technical integrations like XML/JSON feeds; plus professional support with any setup processes in case you need assistance.
Step 1. Create a Publisher Account
To get started, fill out the registration form here.
Keep in mind that even if you already have an advertiser account, you would still need to sign-up for a separate publisher account.
Upon signing up and verifying your account (via email), you can proceed to the dashboard. You’d be happy to know that AdOperator offers a $5 bonus upon sign-up. Easy money!
Step 2. Add Your Websites
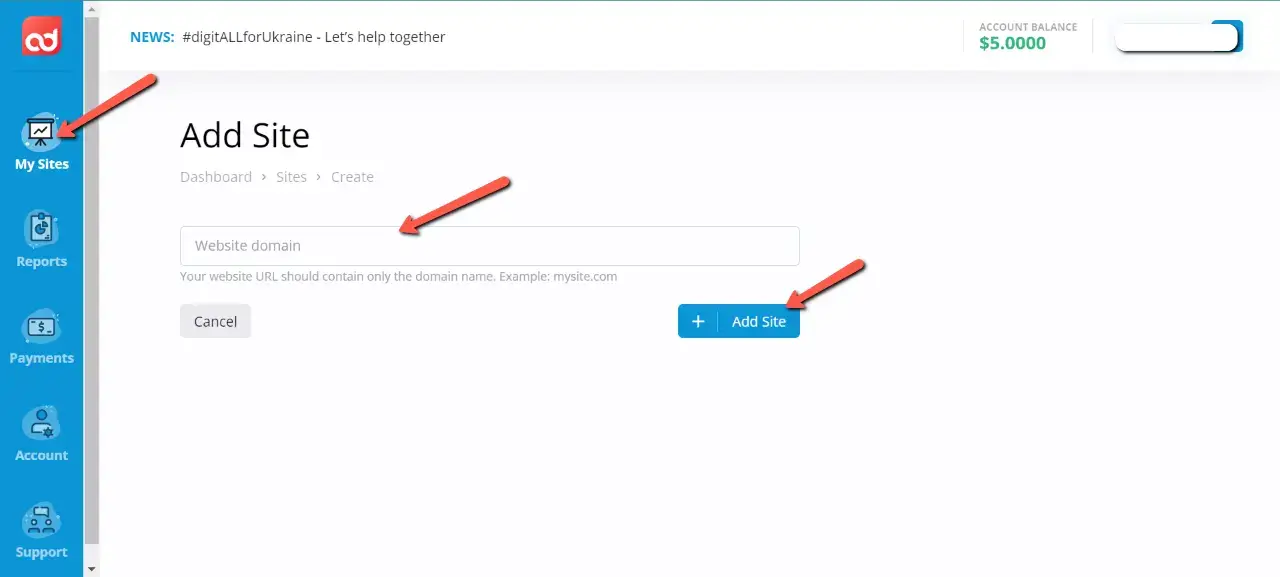
Now to start earning serious money, you’d have to add a website. Once you’re signed in, simply click ‘My Sites’ in the menu and then add your site’s domain on the field.
Click on Add Site, and you will be taken to the verification page. You simply need to copy the meta tag provided and paste it within the head tag of your homepage to verify.
You can also download the verification file and upload it to the root folder of your website. After completing any of the two verification options, click on the Verify button. As soon as your site has been added and verified, you can begin serving ads to that website. You can add as many publishing websites as you like.
Note: Even if you are not yet done with the verification, you can create ad zones for your website by clicking on the “Continue without Verification” button.
Step 3. Creating Ad Zones
Click on the Add Zone button and choose the ad type you want to promote on your website. At the moment, push notifications are not yet available.
Next, add a name for your zone and indicate whether your content is mature in nature (for Adults 18+) if you choose in-page push.
Finally, set your preferences for the following if you choose in-page push:
- Maximum number of push messages on the page
- Delay before opening the first message (in seconds)
- Delay before opening the next message (in seconds)
If you choose popunder, select whether it is a direct link or a popunder.
When everything is set, you can copy the code provided and place it on your website. All you need to do now is get more traffic to your website to start earning from your ads!
Step 4. Monitoring Your Ad Performance and Earnings
AdOperator‘s reports dashboard provides publishers with a detailed breakdown of their websites’ performance, conveniently divided into categories; that way, you can easily view stats for each period based on date, country, subID, website, or zone.
You’ll be able to spot trends instantly and better assess the efficiency of your ads and traffic. All this data (impressions, clicks, and revenue) is presented through an intuitive interface that makes understanding your performance straightforward and simple — no more digging through confusing information.
You can use the information here to optimize your ad placements and make the necessary adjustments.
Step 5. Withdrawing Your Earnings
Getting hold of your funds is easy and straightforward. Withdrawal methods include Capitalist, Webmoney, Paxum, Payoneer, Paypal, USDT, Neteller, Skrill, Revolut, and Bank Transfer — so no matter your preferred payment method, they’ve got you covered. The best part? They have a minimum withdrawal of only $20 — if that’s not reason enough to jump right in with AdOperator, then what is?
AdOperator Pros and Cons for Publishers
Working with AdOperator as a publisher can offer an array of benefits and drawbacks, and we won’t skimp on those in this AdOperator review.
Pros
- Low minimum withdrawal requirement of $20
- Multiple cash-out options
- No minimum traffic requirement
- Sign-up bonus of $5
Cons
- Push notification collection is not available at the moment
AdOperator Verdict
AdOperator is an innovative ad network for any advertiser or publisher who values efficiency and a great customer experience.
It drives stronger results with its cutting-edge technology, dedicated staff, and years of industry expertise.
With AdOperator, you can rest assured that your ad campaigns will reach your target audience and may even outperform the competition, so you can obtain excellent results at lower costs, ensuring a healthy return on investment.
Advertising doesn’t have to be a guessing game when you use AdOperator; why not let their expertise lend a helping hand? It could be the key to unlocking massive success for your business.
We hope this AdOperator review has shed some light on the ins and outs of this advertising network. Try it out today and see for yourself!
This fantastic PropellerAds review is gonna show you how to explore a network that's remarkably famous for its pop traffic!
This MGID review is definitely gonna allow you to earn real big bucks on this remarkably original native advertising ad network!
Read our in-depth Ad-Maven review and learn everything about their platform.


